Data Management
How captured images and metadata are stored with redundant backup (local, Google Drive, OSC) and exported from Lightroom as raw files and 300 PPI PNGs for downstream processing.
File Storage and Redundant Backup
- Save images using the default naming convention on the camera and record names in the metadata sheet for automated renaming.
- This reduces the chance of mistranscription.
- Store images in at least two separate locations (primary storage and sharing).
-
Locally on the Computer, Google Drive, and OSC.
- Google Drive is copied to OSC regularly with the following shell script. Replace
<PROJECT-CODE>with your project code. The local directory should be set based on the HPC system used.
#!/bin/bash # Exit if any command fails set -e # Set remote name and path REMOTE="GoogleDrive_NEONBeetle2" # Set local destination LOCAL_DIR="/fs/ess/<PROJECT-CODE>/CarabidImaging/" # Use rclone to copy only new or updated files rclone copy "$REMOTE:" "$LOCAL_DIR" \ --drive-export-formats xlsx \ --update \ --verbose \ --exclude "*/Student/" \ --log-file="$LOCAL_DIR/rclone_sync.log" - Google Drive is copied to OSC regularly with the following shell script. Replace
-
Data Exports
- Locate the raw images in the computer's file system:
C:\Users\biorepository\Desktop\Beetle Tray Pics\BTray\ABTrays\ABTrays-NEONBiorepository\ - Select all of the Raw photos (
.CR3files) and copy them to the Google Drive in the folder/Images/Raw/. - In Lightroom, select all photos from the date of imaging
- Click the grid view (looks like a grid of boxes at the bottom left of the interface):
 and use Shift
 + clickto select all images of interest
- Click the grid view (looks like a grid of boxes at the bottom left of the interface):
- Right-click on selected images and select “Export”:
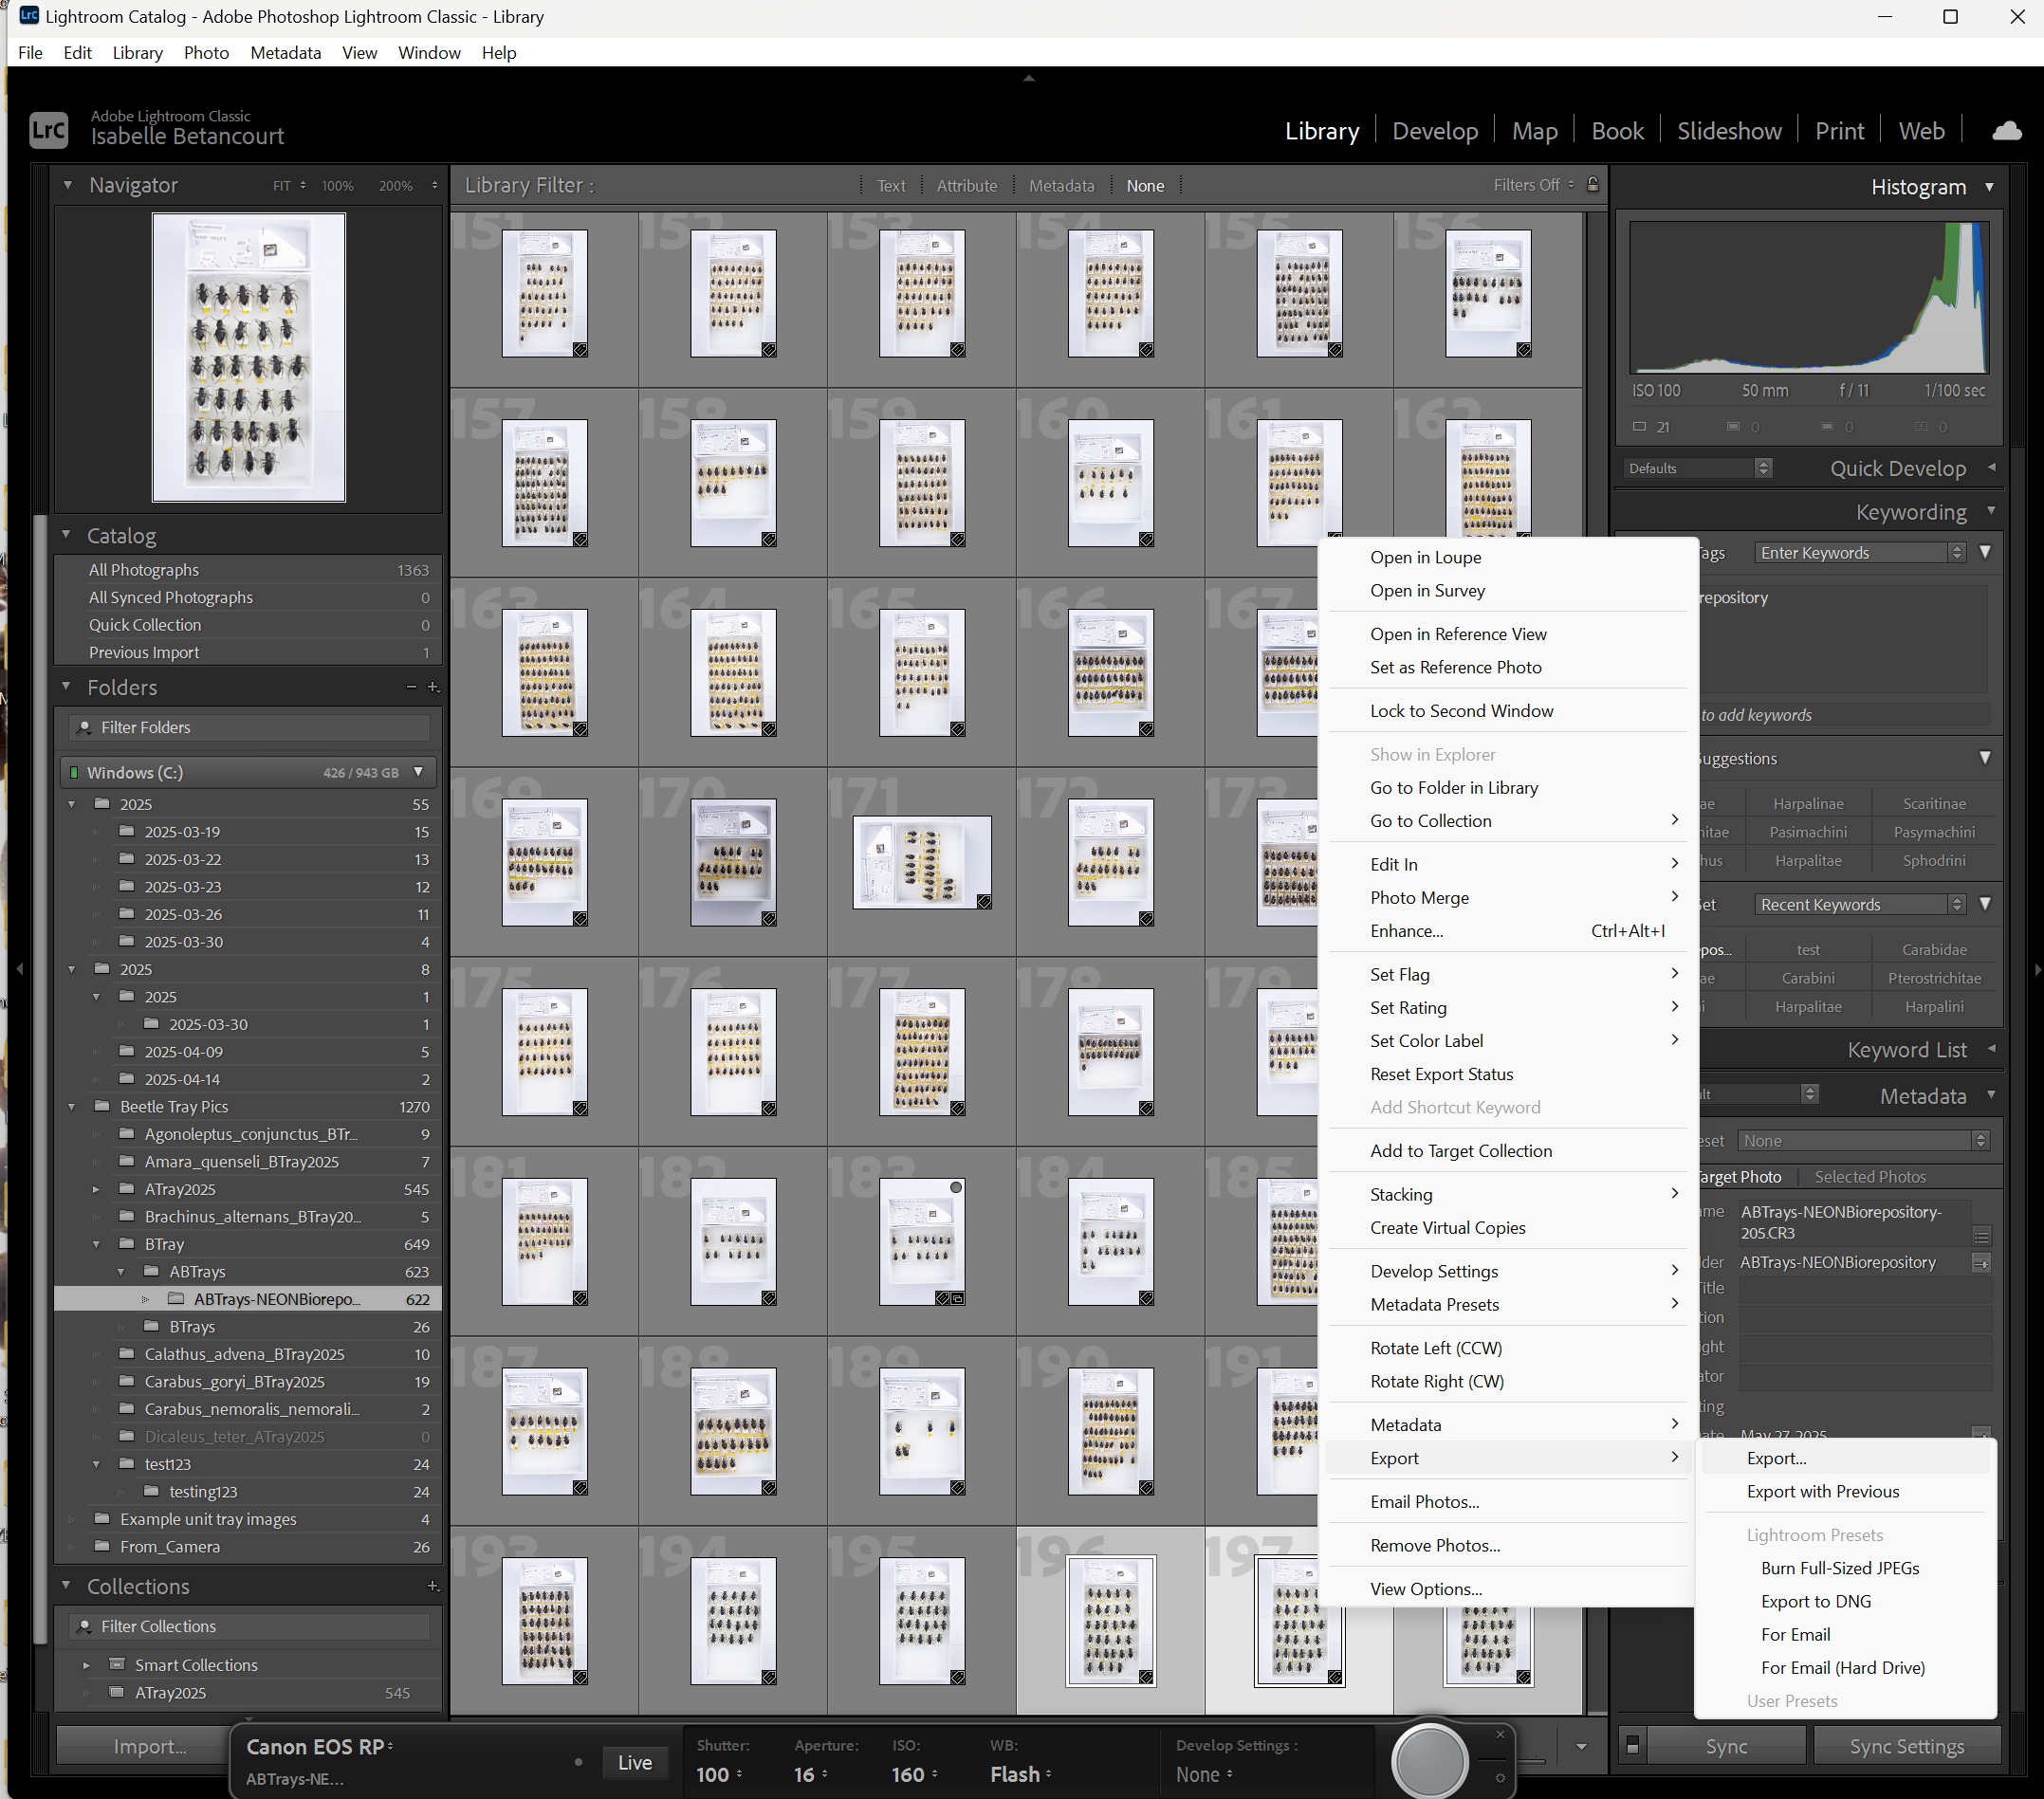
- Export as
PNG(This export takes a while).- Ensure that the PPI is assigned to 300:
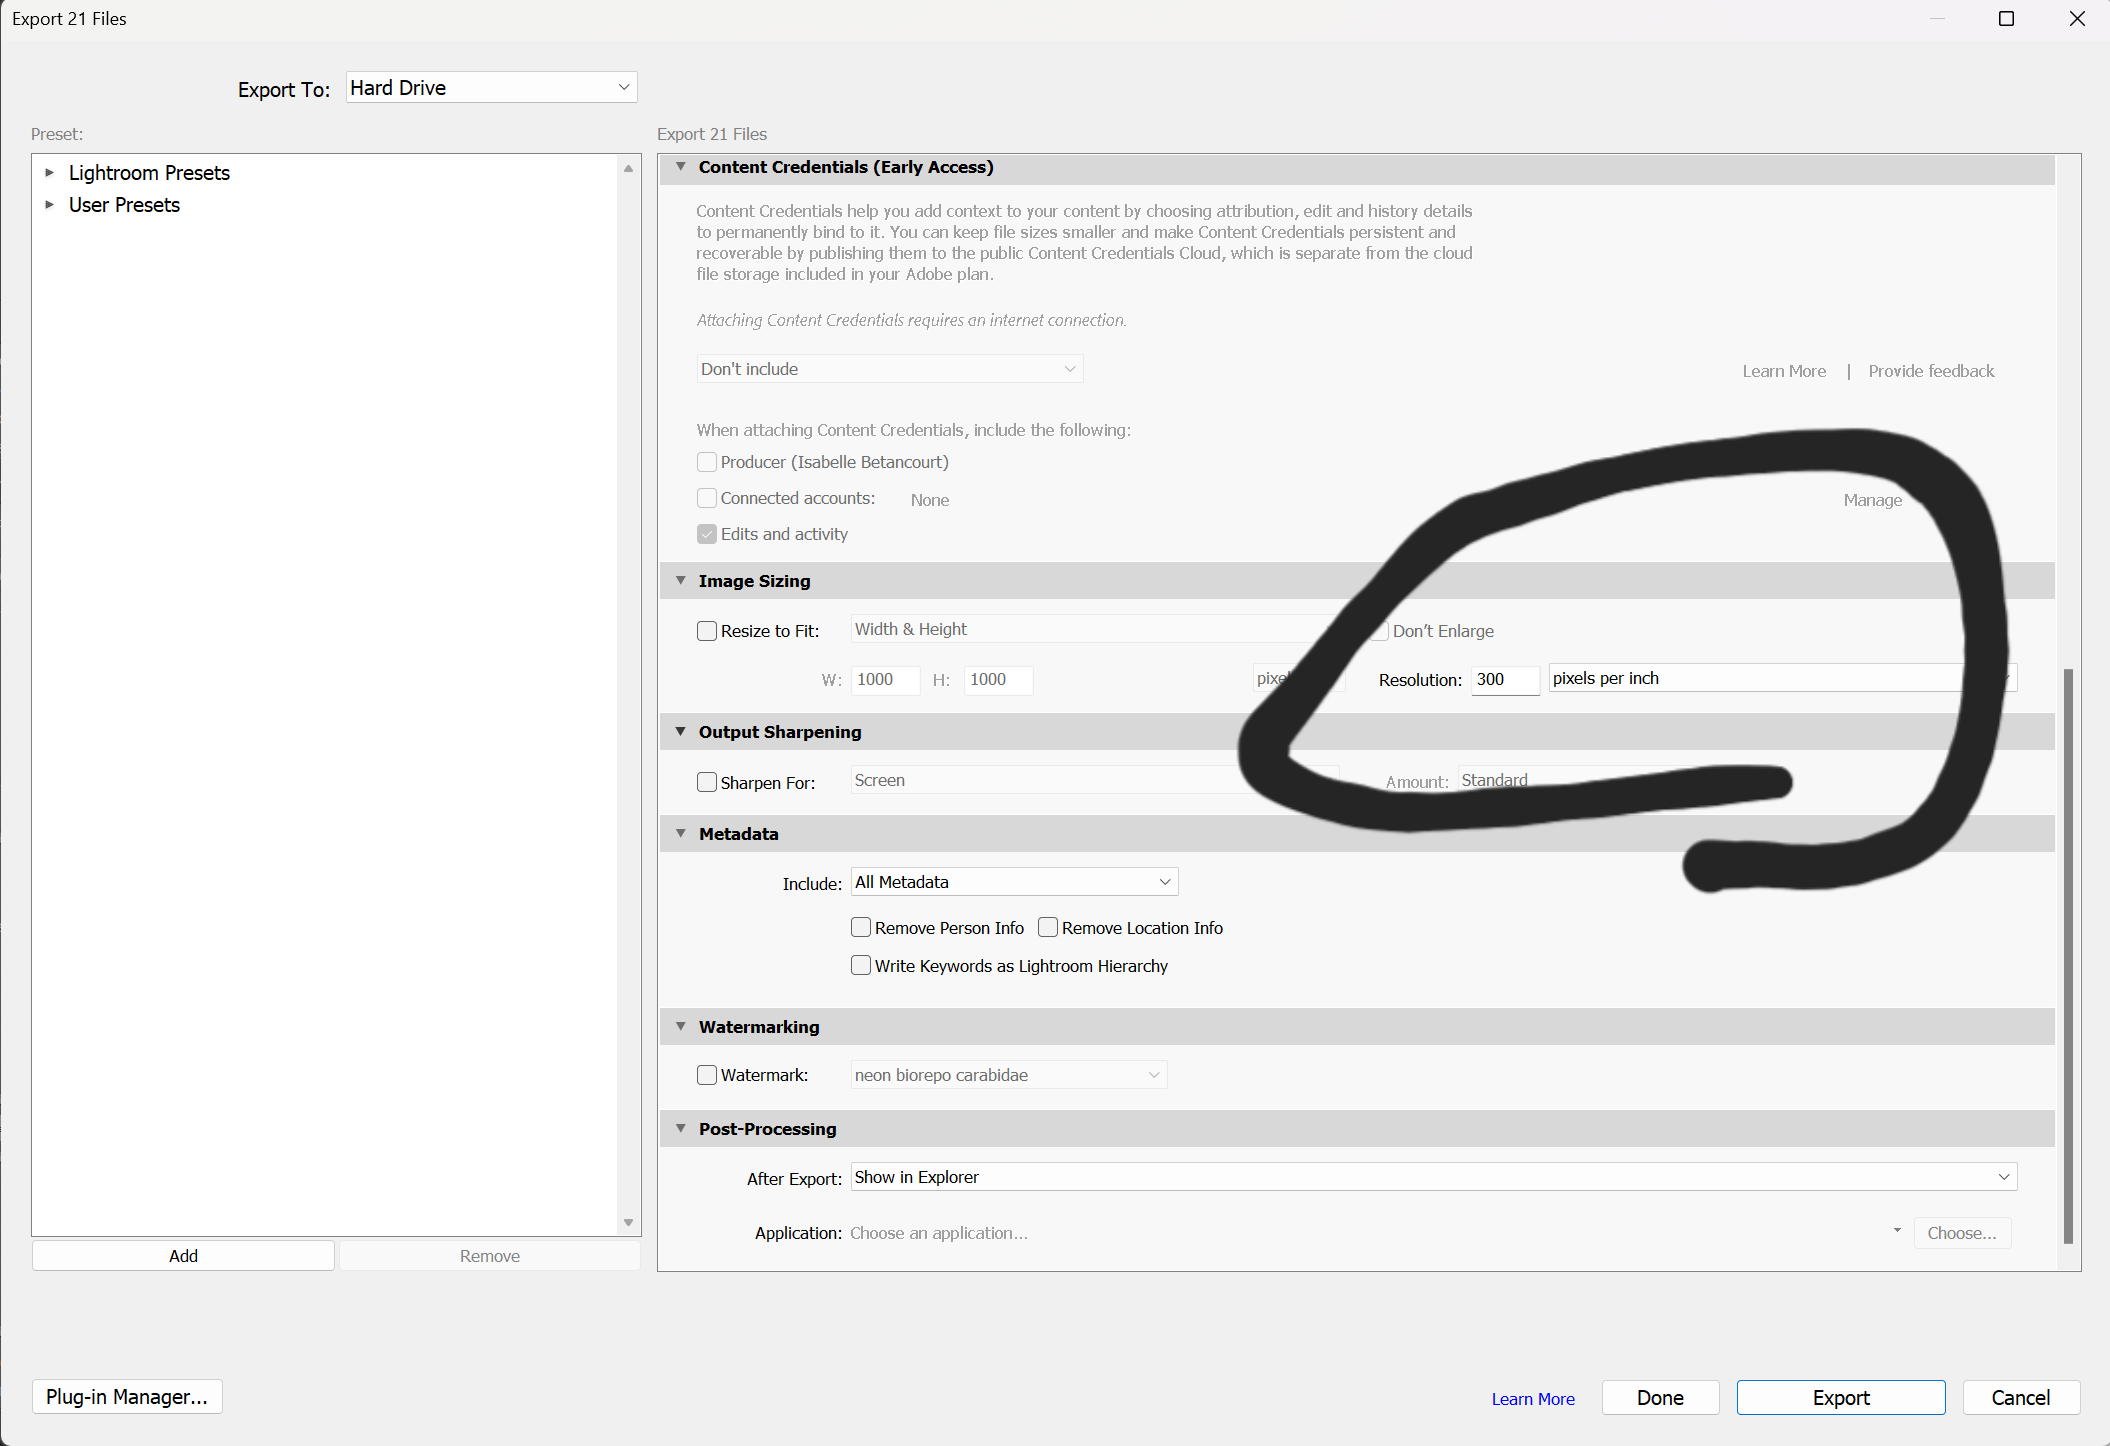
- Don’t modify the names
- Export in the folder:
C:\\Users\\biorepository\\Desktop\\Beetle Tray Pics\\BTray\\ABTrays\\ABTrays-NEONBiorepository\\PNGs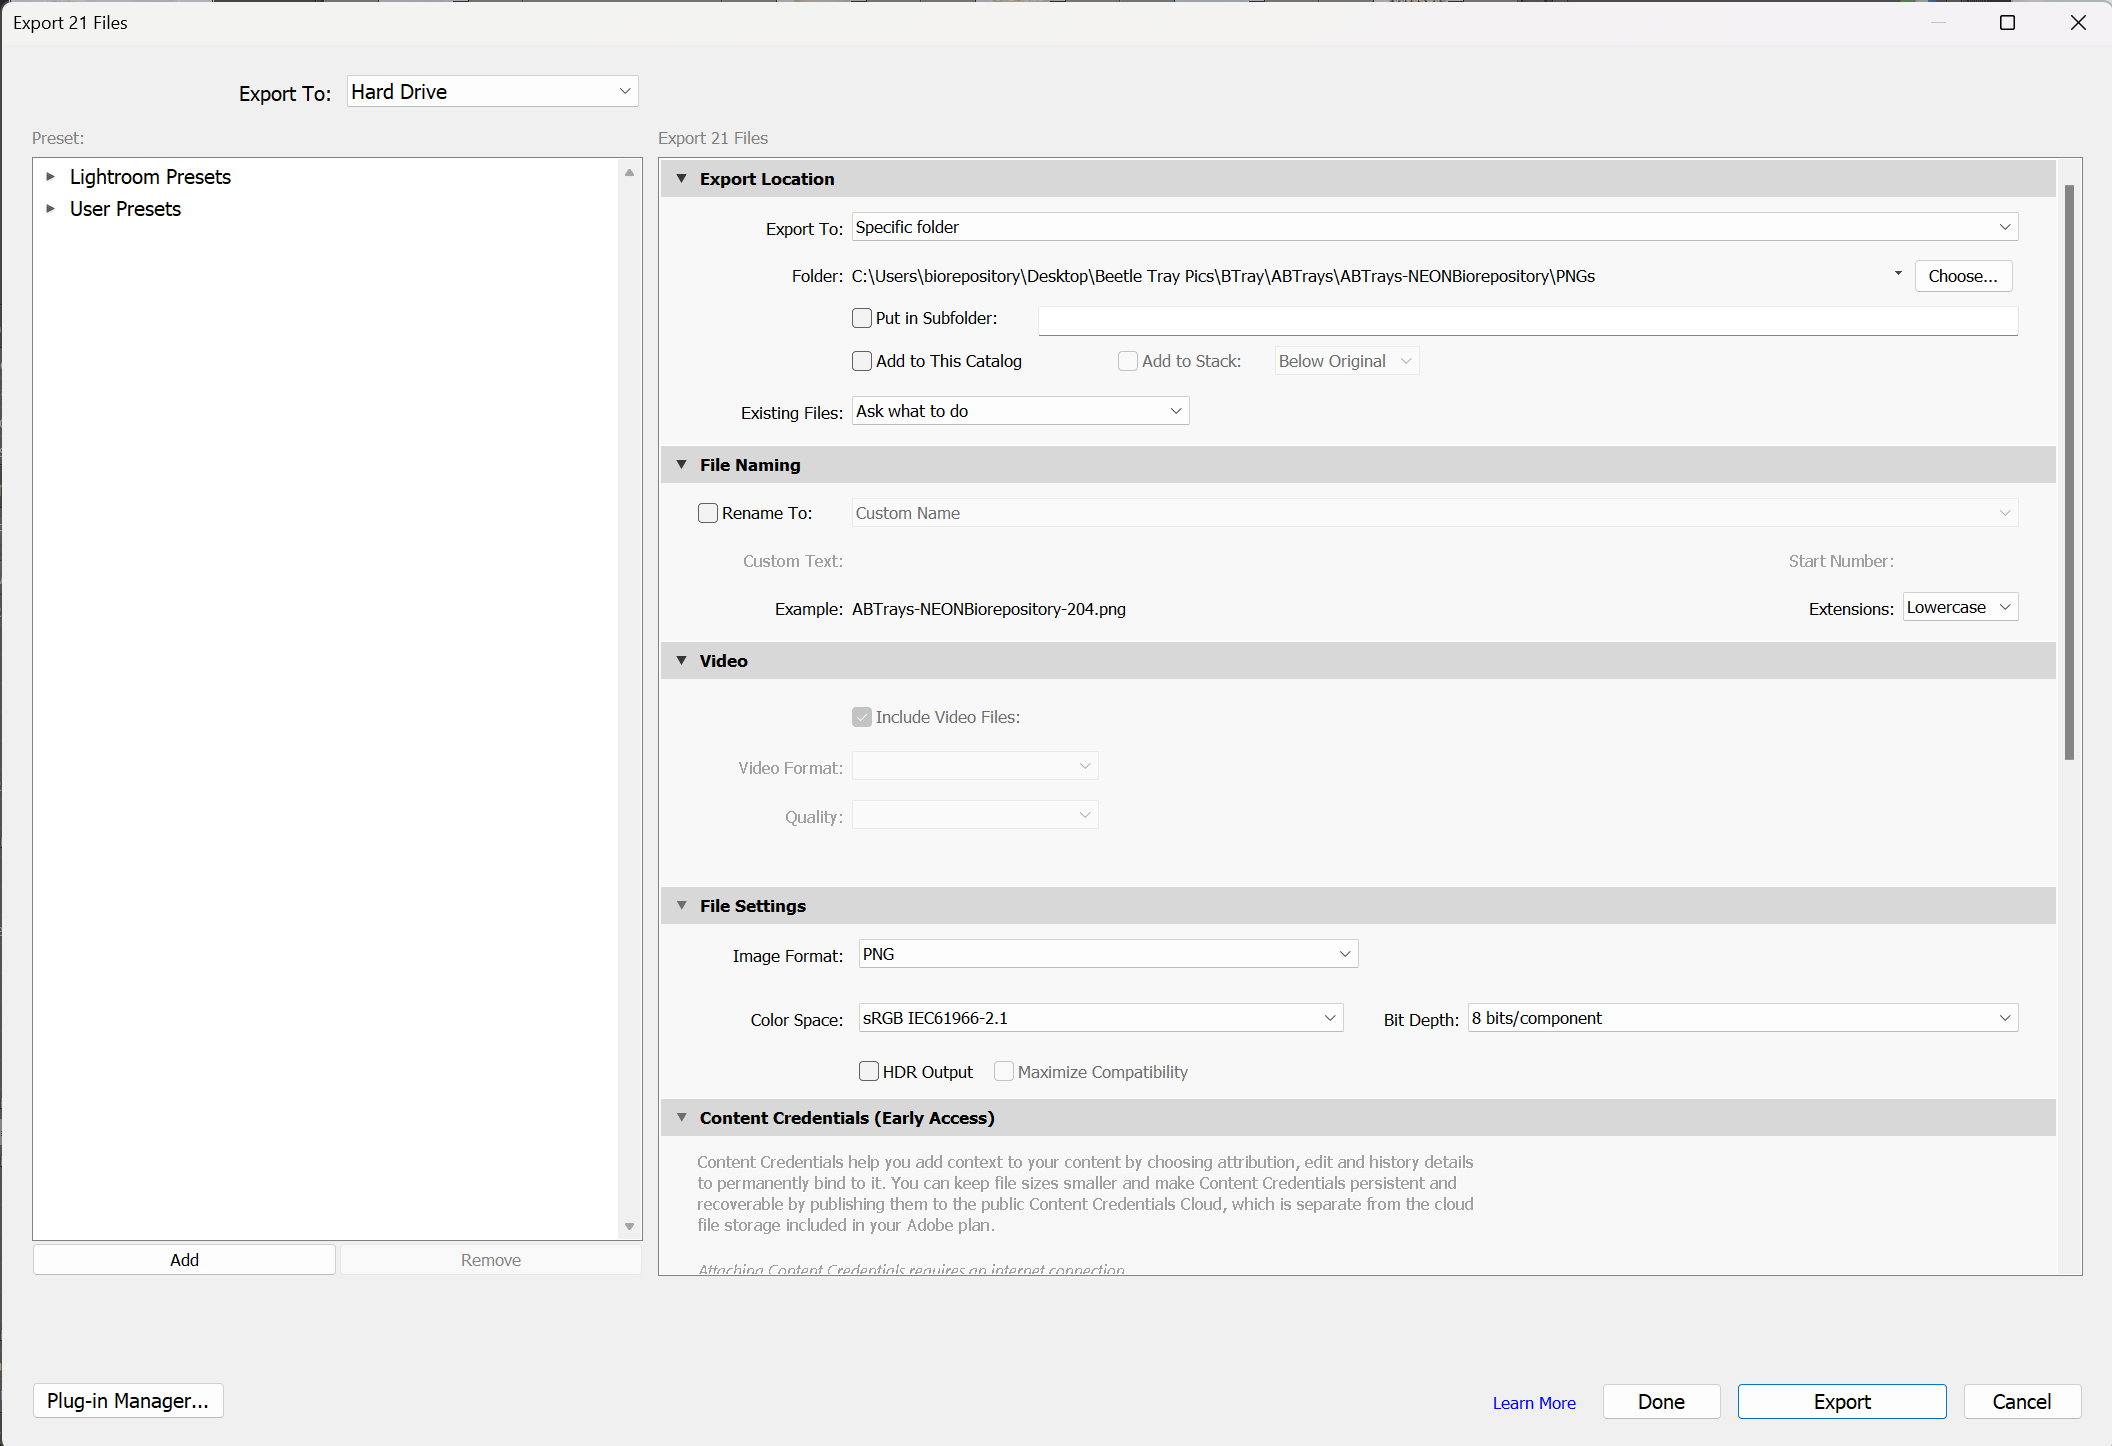
- Ensure that the PPI is assigned to 300:
- Once the export is done, select all PNGs and upload them to the Google Drive in the folder
/Images/PNG/